Having a properly installed furnace is essential for maintaining a comfortable home, especially during colder months. The furnace installation process involves several important steps that ensure your heating system operates efficiently and safely. Understanding these steps helps homeowners make informed decisions and prepares them for what to expect during installation.
Choosing the Right Furnace for Your Home
Selecting the right furnace is crucial for ensuring your home remains warm and comfortable. When choosing a furnace, consider the size of your home. A furnace that is too small won’t provide adequate heat, while one that is too large can lead to inefficient energy use. It is essential to choose a furnace that matches your home’s heating needs.
Energy efficiency is another important factor in selecting a furnace. Look for models with high-efficiency ratings. These models use less energy to produce the same amount of heat, resulting in lower energy bills. Additionally, energy-efficient furnaces are better for the environment, reducing your carbon footprint.
Consider the type of furnace that best suits your home. There are several options, including gas, electric, and oil furnaces. Gas furnaces are popular due to their cost-effectiveness and efficiency. Electric furnaces are generally easier to install and maintain, while oil furnaces can provide powerful heat output. Our professionals can help you understand the pros and cons of each type and recommend the best option for your specific needs.
Preparing Your Home for Installation
Proper preparation is essential for a smooth furnace installation process. Start by ensuring that the installation area is easily accessible. Clear any obstructions that might hinder our technicians from performing their work efficiently. This includes moving furniture, storage boxes, and any other items that may be in the way.
Inspect existing ductwork to ensure it is in good condition. Leaky or damaged ducts can lead to significant heat loss, reducing the efficiency of your new furnace. If necessary, have ducts sealed or repaired before installation. Our professionals can inspect the ductwork and recommend any needed repairs.
Check that all necessary connections, such as gas lines and electrical wiring, are in place and up to code. Faulty connections can cause delays and safety hazards. It is also a good idea to plan for proper ventilation, as efficient airflow is crucial for the furnace’s performance and safety.
Step-by-Step Furnace Installation Process
Understanding the steps involved in furnace installation helps set expectations and ensures you know what our technicians are doing.
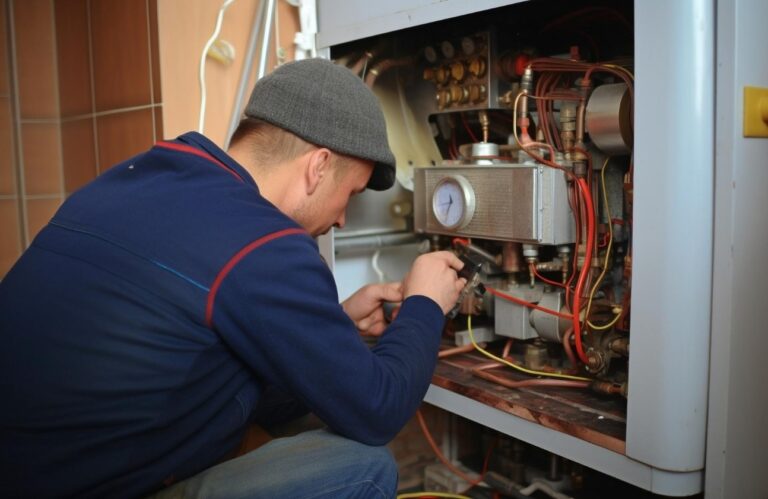
1. Removing the Old Furnace: The first step is to disconnect and remove the old furnace. Our professionals will safely disconnect electrical and gas lines, followed by removing the furnace. This step ensures there is a clean and safe area for installing the new unit.
2. Setting Up the New Furnace: Once the old furnace is removed, our technicians will carefully position the new furnace. They will make sure it is level and properly situated in the designated area. Correct placement is essential for optimal performance and safety.
3. Connecting the System: The next step involves connecting the new furnace to existing ducts, electrical lines, and gas supply. Each connection is inspected and tested to ensure it meets safety standards. Proper sealing ensures no leaks, which is crucial for energy efficiency.
4. Testing the System: After all connections are made, our professionals will test the furnace to ensure it is operating correctly. They will check for proper airflow, ignition, and thermostat functionality. Any issues identified during testing will be promptly addressed.
5. Final Inspection: Once testing is complete, a final inspection is performed to ensure everything is in order. This includes checking for any potential safety hazards and verifying that the system operates efficiently.
Ensuring Proper Function and Efficiency
Ensuring your furnace operates efficiently is key to maintaining a comfortable home and controlling energy costs. Proper function and efficiency start with professional installation by our skilled technicians.
1. Regular Maintenance: Regular maintenance helps keep your furnace running smoothly. Schedule annual inspections to check for wear and tear, clean filters, and ensure all components are in good working order. Preventive maintenance helps avoid unexpected breakdowns and prolongs the furnace’s lifespan.
2. Proper Ventilation: Adequate ventilation is crucial for efficient furnace operation. Ensure there are no blockages in the ducts and that the vents are open and unobstructed. Proper airflow reduces strain on the furnace and improves heating efficiency.
3. Thermostat Settings: Proper thermostat settings play a significant role in furnace efficiency. Set your thermostat to a comfortable temperature and avoid frequent adjustments. Consider using a programmable thermostat to maintain consistent heating and reduce energy consumption.
4. Monitor Performance: Keep an eye on your furnace’s performance. Listen for unusual noises, check for uneven heating, and note any changes in energy bills. Early detection of issues can prevent more significant problems and costly repairs.
Conclusion
A successful furnace installation involves choosing the right unit, preparing your home, following a detailed installation process, and ensuring proper function and efficiency. By understanding these steps, homeowners can ensure their heating system operates efficiently and reliably.
For expert furnace installation in Norwalk, trust Power Pro Plumbing Heating & Air. Contact us today to schedule your furnace installation and ensure your home stays warm and comfortable!